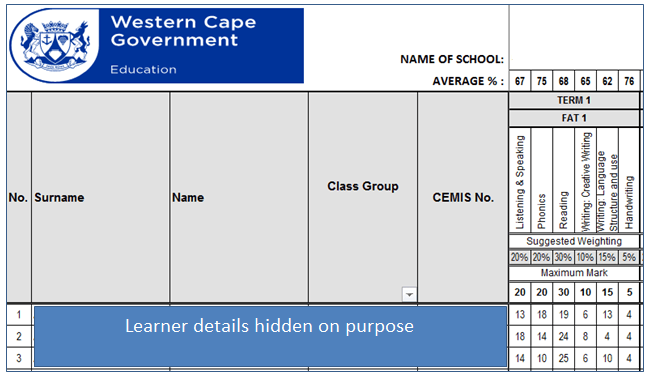
High-Level Overview of the Process
There are five stages to complete the entire recording and reporting (R&R) and data upload process. These stages are as follows:
- Download R&R Tool and Learner Data file
- Generate/Load R&R Tool
- Importing assessments marks
- Exporting data file from R&R Tool
- Upload data file via CEMIS
The high-level process is illustrated in the figure below. Each stage is explained in more detail in the subsequent sections.

Stage 1: Download R&R Tool and Learner Data File
This section describes how to download the R&R Tool and the associate learner data file for the particular grade from CEMIS.
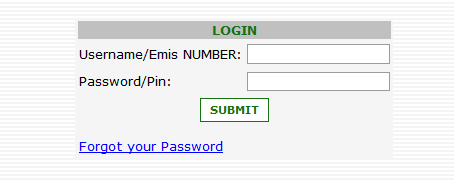
- Log on to CEMIS
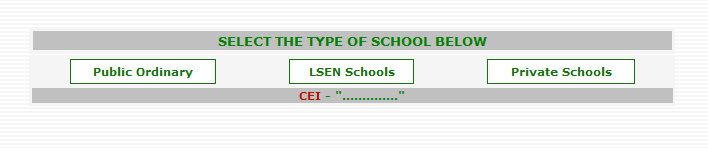
- Select the School Type
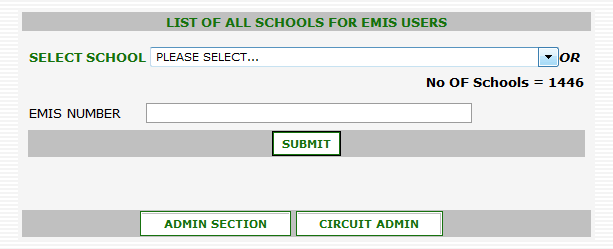
- Select the School and click on the “Submit” button
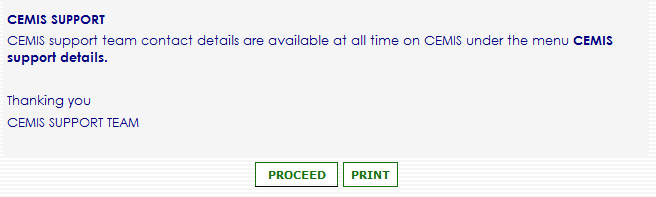
- Scroll down and click on the “Proceed” button
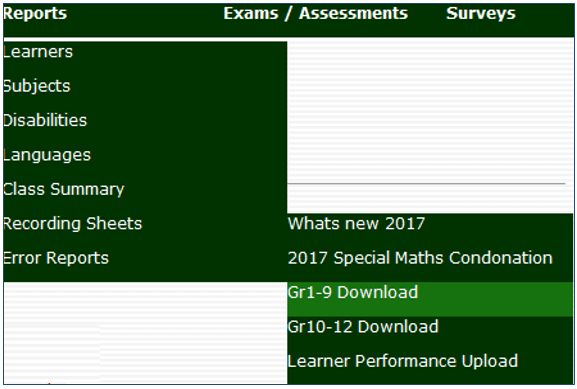
- Select the “Recording Sheets” option from the “Reports” menu bar option, then select the “Gr1-9 Download” option from the “Recording Sheets” option
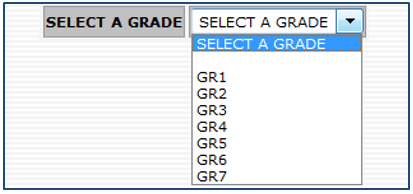
- Select the applicable grade from the “Select a Grade” dropdown menu
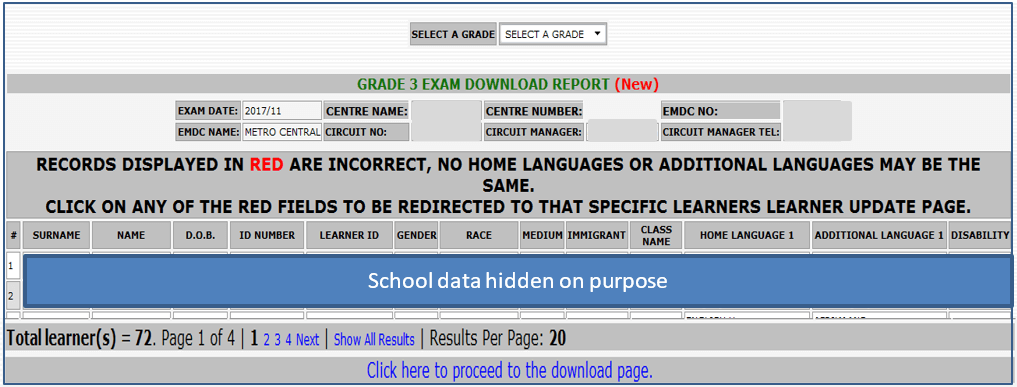
- A page will be shown displaying the learner data. Scroll to the bottom of the page and click on the “Click here to proceed to the download page” hyperlink
- Detailed instructions are provided on the Download Page. The summarised steps follows:
- Print the instructions if required
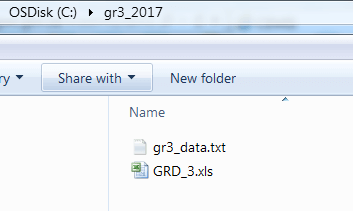
- Create a folder to store the Excel Spreadsheet (R&R Tool)
- Download the Excel Spreadsheet (R&R Tool)
- Download the learner data file
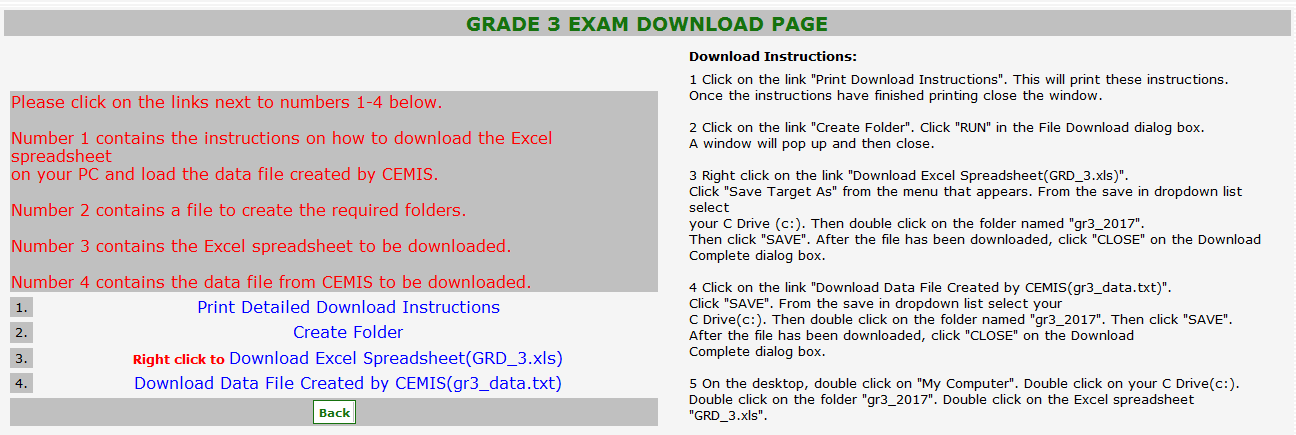
- Ensure that the R&R Tool downloaded and data file downloaded are saved in the same folder created in the steps above.
- Log out of CEMIS
Stage 2: Activate R&R Tool and Load Learner Data
- This section describes how to activate the R&R Tool and load the learner data file obtained from CEMIS into the R&R Tool.
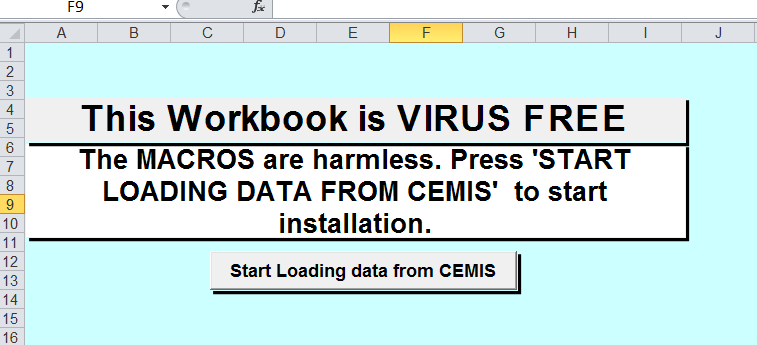
- Double-click on the Excel file to open the R&R Tool (named “GRD_3.xls” or similar).
- The R&R Tool will open and display the following screen
- Click on the “Start Loading data from CEMIS” button to load the learner data file. Note that this may take while.
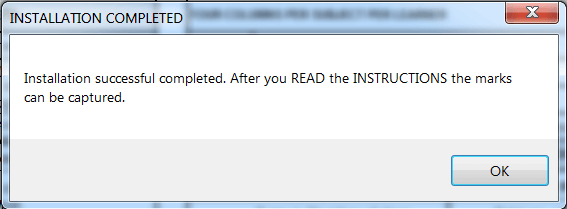
- The following message will be displayed on successful completion of the learner file load.
- Click on the “OK” button
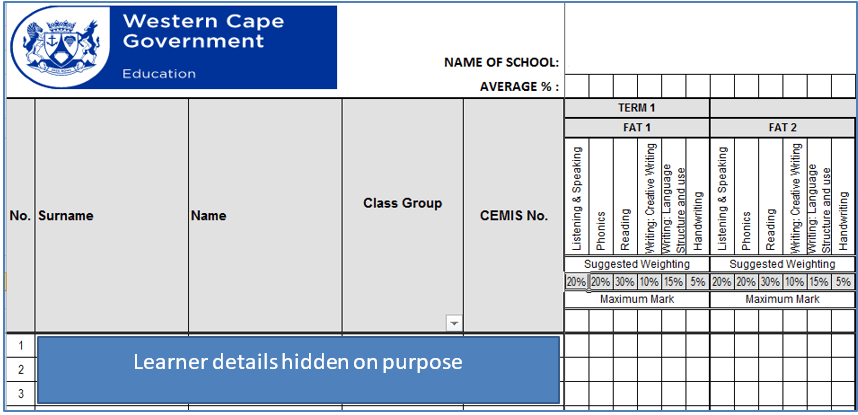
- Inspect the subject sheets. Learner details will be displayed for each subject. Note that there will not be any marks at this stage.
Stage 3: Import Assessment Data
This section describes how to import data from an R&R Tool (Excel Spreadsheet) that contains previously captured data.
[Describe multiple imports – different class files to be combined in a grade file]
[Include addendum for importing errors – “go to” section]
Prerequisite:
Ensure that the R&R Tool containing the data is in the same folder as the newly activated R&R Tool
- Open the newly activated R&R Tool and navigate to the “Personal Info” worksheet
- On the “Personal Info” worksheet, click on the “Import marks” button

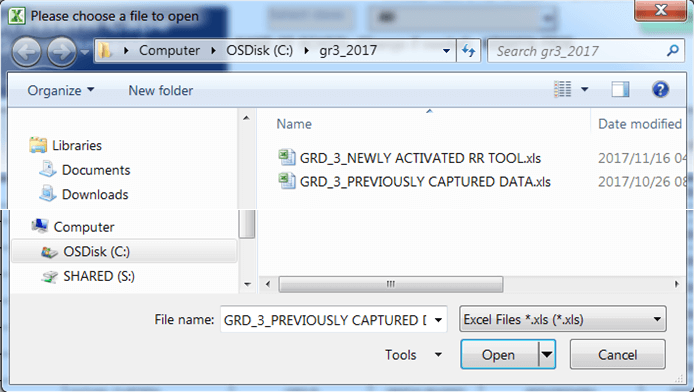
- Navigate to where the R&R Tool that contains the data have been saved is (here called the “GRD_3_PREVIOUSLY CAPTURED DATA”).
- Select the file and click on the “Open”
Do not describe errors in the narrative. Rather in the appendix section]
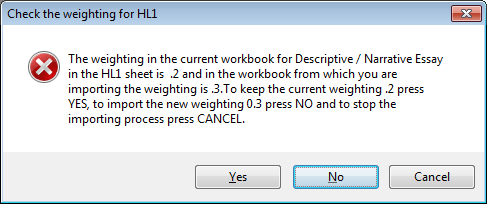
- If there are discrepancies between the weighting of the selected file and the R&R Tool to which the data is being imported to, a warning screen will pop up. Select the applicable action.
- If there are further discrepancies between weighting found the following warning screen will pop up. Select the appropriate action.
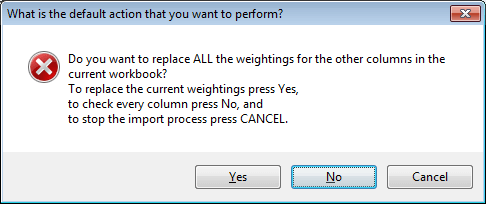
- NOTE: The program also checks for other discrepancies. In all instances a warning message will pop up. Choose the appropriate action (as per above examples).
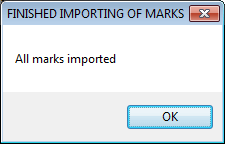
- Once all the marks have been imported the program will display an “All marks imported” message box.
- Click on the “OK” button
- The newly activated R&R Tool will import the data from the selected file.
- A message box will be displayed to inform the user that the marks have been imported.
- Click on the “OK” button to close the message box
- Inspect the subject sheets. The data should now show in the R&R Tool into which the data have been imported.
- The R&R Tool may now be saved. (Note that it is good practice to save regularly throughout the process.)
Stage 4: Export Data
This section explains how to export the data from the R&R Tool.
- Go to the “Personal Info” worksheet and click on the “Export” button

- Once the file has been exported a “Data Exported” message box will be displayed.
- Click on the “OK” button to close the message box.
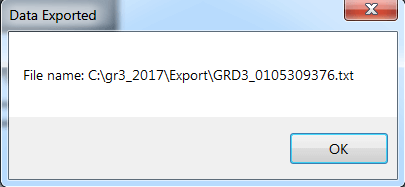
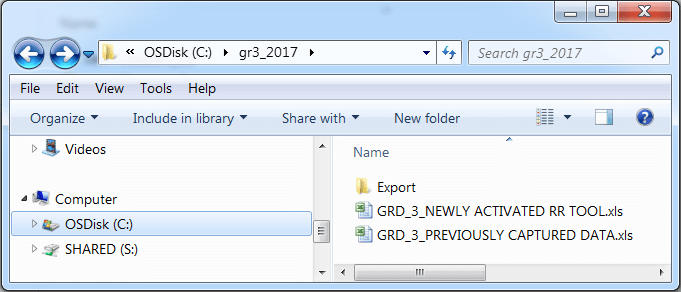
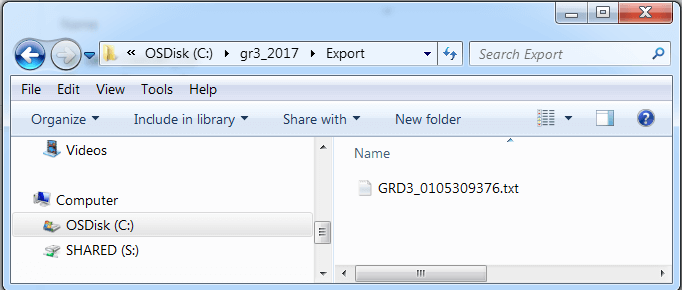
- Note that the exported file will be saved in the “Export” subfolder created automatically by the R&R Tool. See below.
- WARNING: Do not change the filename before uploading. The exported filename is the exact format that is required for upload to CEMIS.
- Click on the export folder to inspect that file have been saved
Stage 5: Upload Data
- Log on to CEMIS as per normal process
- Select the “Recording Sheets” option from the “Reports” menu bar option, then select the “Learner Performance Upload” option from the “Recording Sheets” option
- Take out the Gr10-12 part of the CEMIS screenshots x2

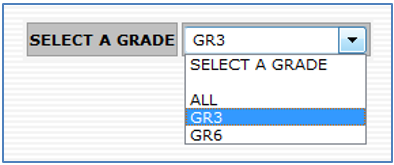
- The grade selection screen will be displayed. Choose a grade from the “Select a Grade” dropdown menu. (Note that only Grade 3, 6 and 9 will be active currently.)
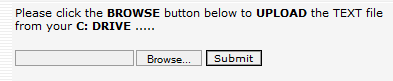
- Click on “Browse…” button to upload the exported text file.
- Check if this is the correct screenshot
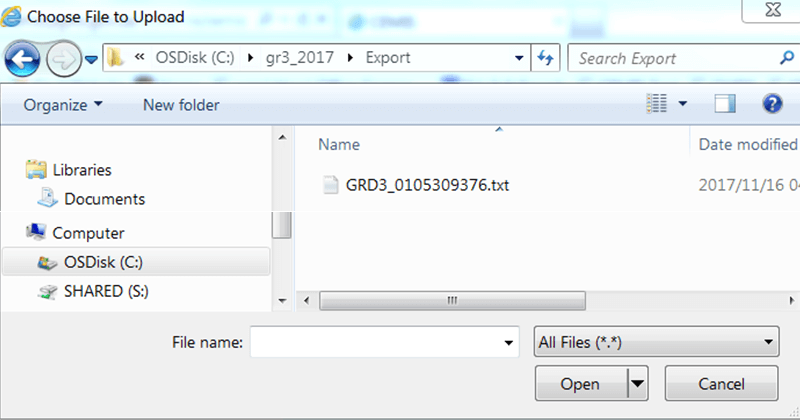
- Navigate to where the file to be uploaded is stored (in “Export” sub-folder).
- Select the file you want to upload and click on the “Open” button to upload the file.
- Click on the “Submit” button to complete the upload process

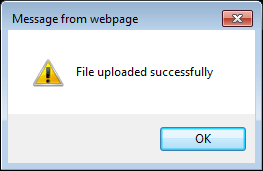
- The system will display a “File uploaded successfully” message
- Click on the “OK” button to close the message box.
- Message box may change. Check again before final version of doc.
- The system will display a “File loaded into Staging Area”.
- [WARNING: If the user changed the filename to an incorrect format an “Invalid filename convention”error message will be displayed. Ensure that the filename is correct and upload the file again.]
- Click on the “OK” button to close the message box.

- This ends the file upload process