High-Level Overview of the Process
There are five stages to complete the entire recording and reporting (R&R) and data upload process. These stages are as follows:
- Download R&R Tool and Learner Data file
- Generate/Load R&R Tool
- Importing assessments marks
- Exporting data file from R&R Tool
- Upload data file via CEMIS
The high-level process is illustrated in the figure below. Each stage is explained in more detail in the subsequent sections.

Table of Contents
Stage 1: Download R&R Tool and Learner Data File
This section describes how to download the R&R Tool and the associate learner data file for the particular grade from CEMIS.
- Log on to CEMIS
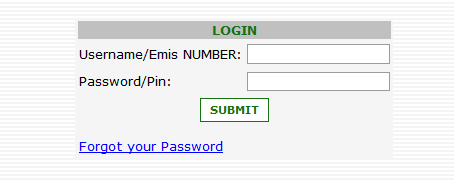
- Select the School Type

- Select the School and click on the “Submit” button
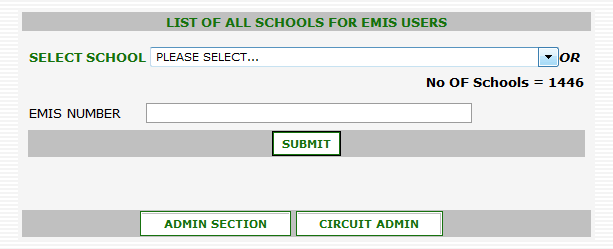
- Scroll down and click on the “Proceed” button

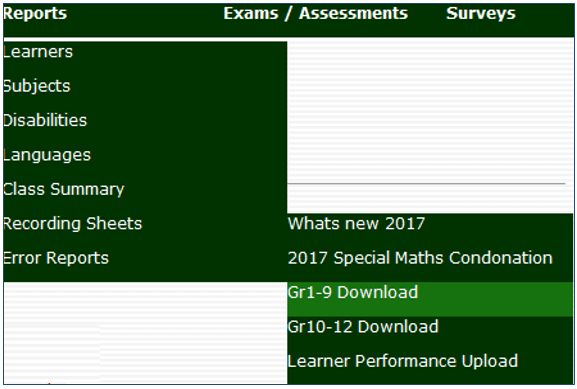
- Select the “Recording Sheets” option from the “Reports” menu bar option, then select the “Gr1-9 Download” option from the “Recording Sheets” option
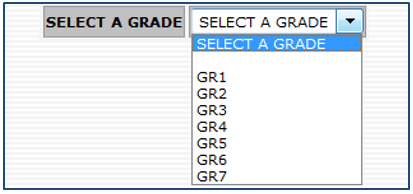
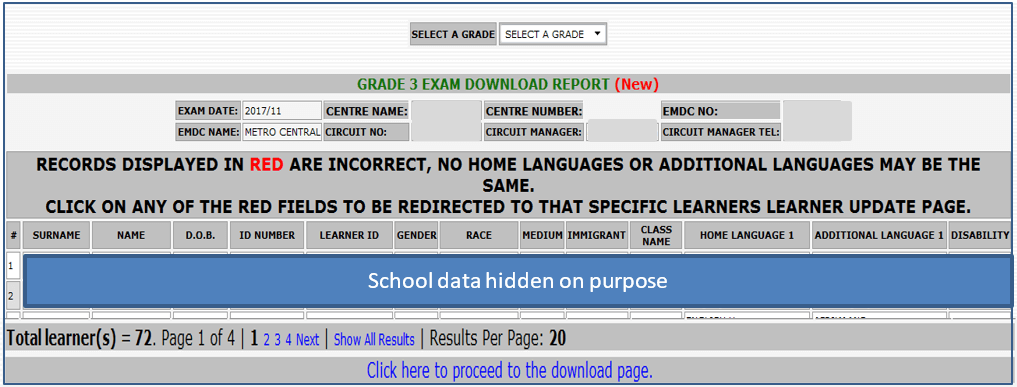
- Select the applicable grade from the “Select a Grade” dropdown menu
- A page will be shown displaying the learner data. Scroll to the bottom of the page and click on the “Click here to proceed to the download page” hyperlink
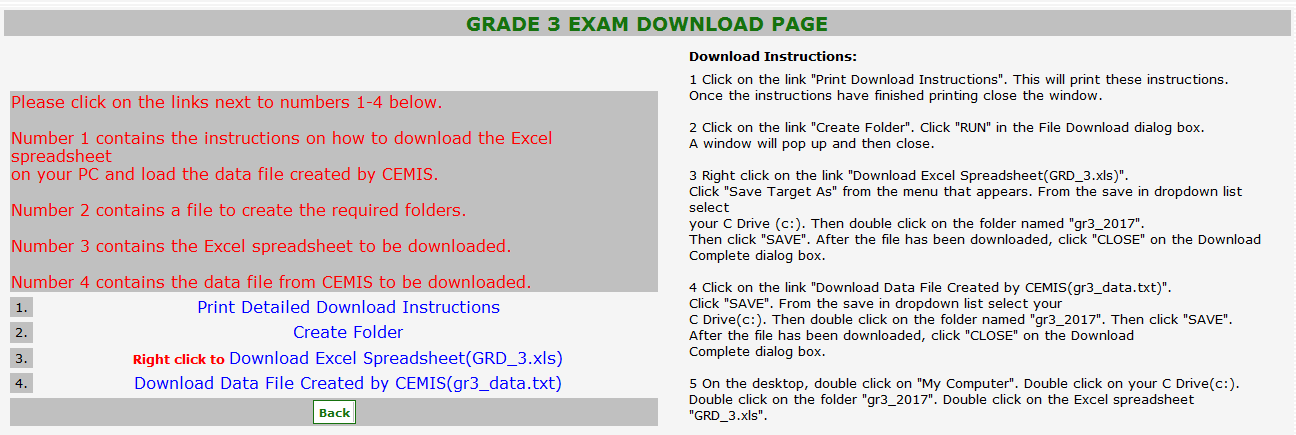
- Detailed instructions are provided on the Download Page. The summarised steps follows:
- Print the instructions if required
- Create a folder to store the Excel Spreadsheet (R&R Tool)
- Download the Excel Spreadsheet (R&R Tool)
- Download the learner data file
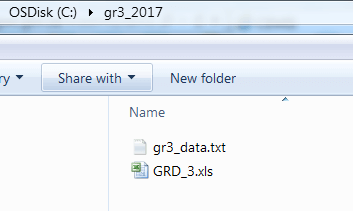
- Ensure that the R&R Tool downloaded and data file downloaded are saved in the same folder created in the steps above.
- Log out of CEMIS
Stage 2: Activate R&R Tool and Load Learner Data
- This section describes how to activate the R&R Tool and load the learner data file obtained from CEMIS into the R&R Tool.
- Double-click on the Excel file to open the R&R Tool (named “GRD_3.xls” or similar).
- The R&R Tool will open and display the following screen
- Click on the “Start Loading data from CEMIS” button to load the learner data file. Note that this may take while.

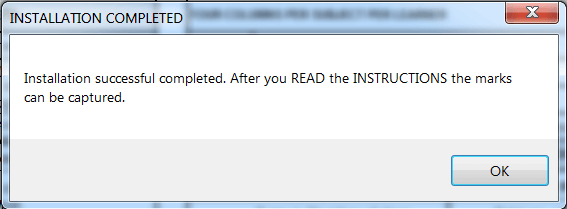
- The following message will be displayed on successful completion of the learner file load.
- Click on the “OK” button
- Inspect the subject sheets. Learner details will be displayed for each subject. Note that there will not be any marks at this stage.
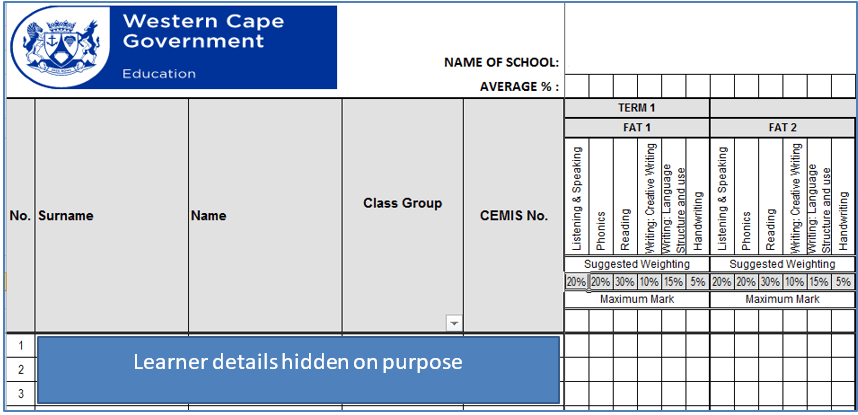
Stage 3: Import Assessment Data
This section describes how to import data from an R&R Tool (Excel Spreadsheet) that contains previously captured data.
[Describe multiple imports – different class files to be combined in a grade file]
[Include addendum for importing errors – “go to” section]
Prerequisite:
Ensure that the R&R Tool containing the data is in the same folder as the newly activated R&R Tool
- Open the newly activated R&R Tool and navigate to the “Personal Info” worksheet
- On the “Personal Info” worksheet, click on the “Import marks” button

- Navigate to where the R&R Tool that contains the data have been saved is (here called the “GRD_3_PREVIOUSLY CAPTURED DATA”).
- Select the file and click on the “Open”

Do not describe errors in the narrative. Rather in the appendix section]
- If there are discrepancies between the weighting of the selected file and the R&R Tool to which the data is being imported to, a warning screen will pop up. Select the applicable action.

- If there are further discrepancies between weighting found the following warning screen will pop up. Select the appropriate action.
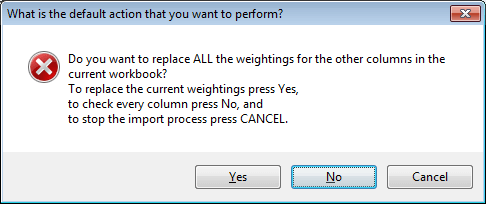
- NOTE: The program also checks for other discrepancies. In all instances a warning message will pop up. Choose the appropriate action (as per above examples).
- Once all the marks have been imported the program will display an “All marks imported” message box.
- Click on the “OK” button

- The newly activated R&R Tool will import the data from the selected file.
- A message box will be displayed to inform the user that the marks have been imported.
- Click on the “OK” button to close the message box

- Inspect the subject sheets. The data should now show in the R&R Tool into which the data have been imported.
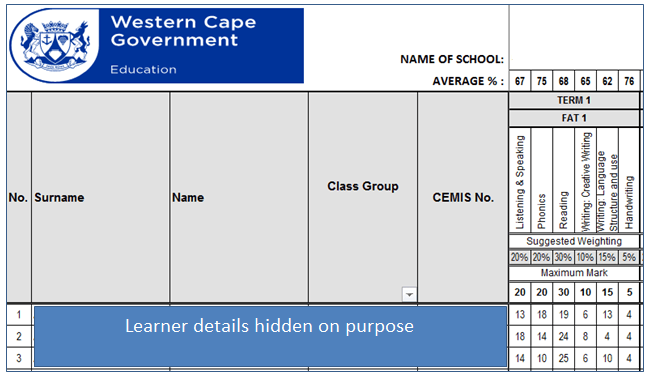
- The R&R Tool may now be saved. (Note that it is good practice to save regularly throughout the process.)
Stage 4: Export Data
This section explains how to export the data from the R&R Tool.
Need Information or Confused about Something ?
Ask a Question- Go to the “Personal Info” worksheet and click on the “Export” button

- Once the file has been exported a “Data Exported” message box will be displayed.
- Click on the “OK” button to close the message box.

- Note that the exported file will be saved in the “Export” subfolder created automatically by the R&R Tool. See below.

- WARNING: Do not change the filename before uploading. The exported filename is the exact format that is required for upload to CEMIS.
- Click on the export folder to inspect that file have been saved

Stage 5: Upload Data
- Log on to CEMIS as per normal process
- Select the “Recording Sheets” option from the “Reports” menu bar option, then select the “Learner Performance Upload” option from the “Recording Sheets” option
- Take out the Gr10-12 part of the CEMIS screenshots x2
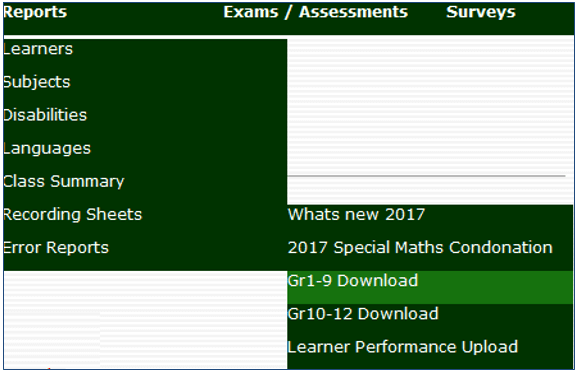
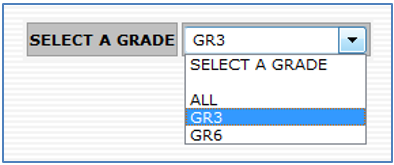
- The grade selection screen will be displayed. Choose a grade from the “Select a Grade” dropdown menu. (Note that only Grade 3, 6 and 9 will be active currently.)
- Click on “Browse…” button to upload the exported text file.
- Check if this is the correct screenshot

- Navigate to where the file to be uploaded is stored (in “Export” sub-folder).
- Select the file you want to upload and click on the “Open” button to upload the file.

- Click on the “Submit” button to complete the upload process

- The system will display a “File uploaded successfully” message
- Click on the “OK” button to close the message box.
- Message box may change. Check again before final version of doc.

- The system will display a “File loaded into Staging Area”.
- [WARNING: If the user changed the filename to an incorrect format an “Invalid filename convention”error message will be displayed. Ensure that the filename is correct and upload the file again.]
- Click on the “OK” button to close the message box.

- This ends the file upload process
Student Loans in South Africa: How to Apply and What to Expect
For many young South Africans, accessing higher education is a dream that often comes with a financial challenge. Fortunately, several student loan optionsstrong> are available in South Africa to help fund university, college, or TVET studies. Whether you’re looking for a government loan like NSFAS or a private student loan from a bank, understanding the process is essential for success.
What Are Student Loans?
Student loans are a form of financial aid provided to eligible students to help cover tuition fees, books, accommodation, and other study-related expenses. In South Africa, these loans can come from government institutions like NSFAS or private banks such as Nedbank, Standard Bank, FNB, and Absa. Most loans offer repayment flexibility and low-interest options until you graduate.
Types of Student Loans in South Africa
- NSFAS (National Student Financial Aid Scheme): A government-funded loan/grant program for students from low-income households. Covers tuition, housing, transport, and meals.
- Bank Student Loans: Offered by most major banks. These are credit-based and require a guardian or parent as a co-signer.
- Private Loan Providers: Companies like Fundi offer educational loans covering various costs such as school fees, gadgets, and textbooks.
Requirements to Qualify for a Student Loan
Each provider has its own criteria, but most South African student loans require the following:
- Proof of South African citizenship or permanent residency
- Proof of registration or acceptance at a recognised tertiary institution
- Parent or guardian with a stable income to co-sign (for private loans)
- Completed application form with supporting documents (ID, proof of income, academic records)
How to Apply for a Student Loan
To apply for a student loan in South Africa, follow these steps:
- Identify your loan provider: Choose between NSFAS, a bank, or a private lender.
- Gather necessary documents: ID copies, academic transcripts, acceptance letters, and income statements.
- Complete the application form online or at a branch.
- Await approval: Some banks offer instant decisions, while NSFAS can take a few weeks.
- Receive disbursement: Funds are typically paid directly to the institution or your account, depending on the lender.
Loan Amounts and Repayment
The loan amount you can receive depends on your chosen lender and financial need:
- NSFAS: Covers full tuition, residence, books, and a personal allowance. The loan becomes a bursary if you pass all your courses.
- Banks: Can provide up to R120,000 or more annually, depending on tuition costs and credit history.
Repayment usually starts after graduation or once you start earning an income. Bank loans may require interest-only payments during your studies. NSFAS repayment only begins when you earn above a specific income threshold.
FAQs on Student Loans in South Africa
1. Can I apply for a student loan without a parent or guardian?
For government loans like NSFAS, yes. But most banks require a financially responsible co-signer, especially for students without an income.
2. Is NSFAS a loan or a bursary?
NSFAS starts as a loan, but it converts to a bursary if you meet academic performance requirements. This means you may not have to pay it back.
3. What is the interest rate on student loans?
Private banks offer competitive rates between 5% and 12%, depending on the applicant's credit profile. NSFAS charges a much lower interest rate, usually linked to inflation.
4. What happens if I fail my courses?
If you’re funded by NSFAS and fail, your loan won’t convert into a bursary, and you’ll need to repay the full amount. Banks may continue charging interest, and your co-signer may be held liable.
5. Can I use a student loan to pay for accommodation and laptops?
Yes. Both NSFAS and many bank student loans cover costs beyond tuition, including housing, meals, textbooks, and electronic devices like laptops or tablets.
Final Thoughts
Student loans in South Africa offer a much-needed financial lifeline to thousands of students every year. Whether you're applying through **NSFAS** or a private bank, ensure you understand the **terms, interest rates, and repayment conditions** before signing any agreement. Make informed decisions today to secure your academic and financial future tomorrow.